By Chef Alli on May 21, 2019
How to Grill
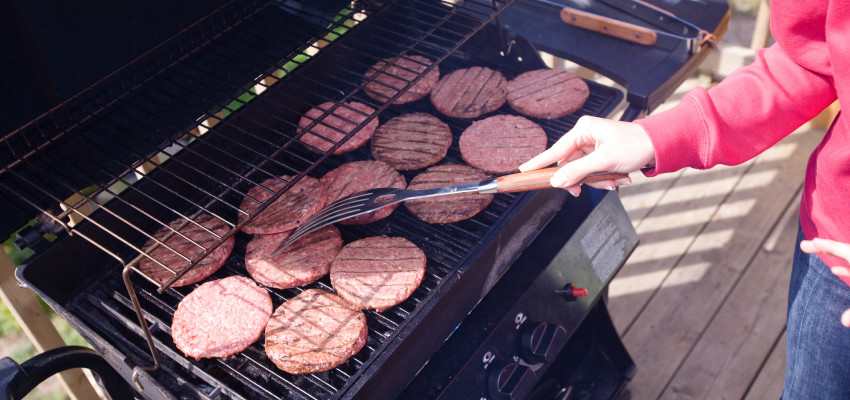
Everything simply tastes better when cooked outdoors over the grill, wouldn’t you agree? If you’ve always wanted to conquer the grill with charcoal or gas, check out these questions and answers. Chef Alli shares all her “how to grill” tips so you and your guests will have the best BBQ experience.
Q: What is the best type of grill--gas or charcoal?
Each one has its strengths, and we actually have both, so I’ve been able to work at each one to learn what I like and dislike. While I adore a charcoal grill for its super power of imparting that lovely charcoal flavor to my burgers, I think a gas grill is the easiest to master as a newbie. Just a turn of a knob, and a gas grill is heating up immediately, no waiting on charcoal to get to its perfect sweet spot for beginning the grilling process.
Plus, a gas grill is easily controlled with that very same knob as well as a temperature gauge that’s typically right inside the lid, it’s a much more consistent and steady cooking source than is a charcoal grill. These things are also good for newbies.
Q: What about the propane? Is acquiring it a hassle?
Gas grills use propane as their heat source. Many convenience and home improvement stores have propane kiosks right out front for purchasing, refilling and/or trading out propane tanks for the grill. The tank will be pretty heavy to lift when it’s full, and super light when it’s empty. Once your tank is empty, go back to the propane kiosk and simply trade your empty tank for a full one.
After each grilling session, be sure you not only turn off the temperature knobs, but also the valve on the propane tank itself. You can leave a disconnected propane tank, covered with the grill cover, under the grill during grilling season--no need to bring it indoors. If you own extra disconnected tanks, they should be stored outside in a dry, well-ventilated location away from flammable materials.
Q: Is it difficult to light a gas grill? That seems a bit scary to me.
Not at all, truly. Just open the lid and turn the burner closest to the ignition switch to high, then press the ignition control. Once the first burner lights, turn on the remaining burners, adjusting the heat level as desired. If the ignition switch doesn’t light the burner when you begin, locate the “manual lighting opening,” usually found on the side of the grill. Turn on the burner closest to that opening and carefully insert a long, lit match into the hole to light the burner.
Q: If gas grills are so superior, why should I consider a charcoal grill?
For one BIG reason: signature smoky flavor While charcoal grills are often much less expensive than gas grills, you will need to purchase a few basic tools before you can get started with it. A chimney starter to hold the charcoal as it lights is super handy, and you’ll need newspaper and a stick lighter for igniting. Many people prefer natural lump charcoal as their fuel since it provides that smoky flavor we long for without the chemical residue of lighter fluid.
Q: What’s the biggest down-side to a charcoal grill?
Charcoal grills definitely require more time to get going, as it can take at least 30 minutes for a chimney starter full of charcoal to get hot and white with ash. In turn, that causes more planning on the part of the hostess since you must account for that as you figure the timing of dinner and all the people waiting on it.
Secondly, the learning curve is steeper with charcoal grilling—it takes time to acquire the experience needed to learn the best way of positioning the coals for appropriate “zone cooking” (see more on that topic below) and for proper adjusting of the air vents to reach and maintain the ideal grilling temperature.
Q: How should I safely ignite the charcoal?
Open up the grill as well as the grill vents. Lightly drizzle a few sheets of newspaper with vegetable or canola oil; crumble these and stuff them into the underside of the chimney starter, then fill the inside of the chimney starter to the top with natural lump charcoal. Set the filled chimney starter on the grate of your charcoal grill, then light the newspaper with your stick lighter. After 40-45 minutes, the coals should be “ashy” and white hot. Carefully dump the prepared coals into the grill box, placing the cooking grate above. Close the grill lid and wait about 15 minutes, letting the cooking grate get nice and hot. Adjust the vents of the grill box and the lid to increase or decrease airflow into the grill. More air means more oxygen and a hotter fire for when you really need to get it roaring, while partially closed vents make for a cooler fire, for times when you want to just maintain the heat over an extended period.
Q: What is zone cooking? Can I accomplish that on any type of grill?
Zone cooking refers to the particular locations of the heat sources on the grill, either the lit burners of a gas grill or the location of the piles of hot coals in a charcoal grill. Direct-heat cooking means the food is placed directly over the flame or heat source. Indirect heat means the food is placed on the grate adjacent to the flame, not directly on top of it. So, on a gas grill, this means one or two burners are lit and the food is placed over the unlit burner(s). On a charcoal grill, that means arranging the coals into a pile in one side of the grill box, then placing the food on the opposite side above. Having both direct and indirect heat really helps the grill master to have better control of how the foods cook. For instance, you can get a steak or burger nicely charred with good grill marks on both sides over direct heat, then move it to an indirect heat area to finish cooking more slowly, keeping the meat from getting over cooked and burned on the exterior, yet fully done internally.
Q: Should I prep the grates for grilling? How is that best done?
The short answer to this question is yes. The first step is to clean the grates. Heat the grill grates to burn off any food buildup, then use a grill brush to scrub the grates clean. (Don’t have a grill brush? Use a pair of tongs with a big, crumpled wad of heavy-duty aluminum foil to scrub the grates clean. I love this method because it really cuts to the chase.)
Now you’re ready to oil the cleaned grates. Never use nonstick sprays to oil the grill grates. Yes, it’s faster, easier and more convenient, but resist this temptation. Nonstick sprays leave sticky residue and causes flare-ups when you’re grilling. Instead, opt for a good rub down of plain old vegetable or canola oil.
Roll up an old kitchen towel or a clean, soft rag into a tight, small bundle; dip this into the oil, then use a pair of tongs to rub the oiled bundle over the hot grill grates.
When you finish grilling and while the grates are still a bit hot, scrub the grates with a grill brush to remove any stuck-on foods or residue. This will help with prep for the next time you want to grill.
Q: How do I know when to close the grill lid and when to leave it open?
A good rule of thumb is this: if the food you are cooking is 3/4” thick or less, leave the lid open. If the food you are cooking is 3/4” thick or more, close the lid. Keeping the grill lid closed keeps the heat inside the grill, causing it to act as an oven, allowing the heat to circulate inside and stay contained. Cooking with the lid open allows the heat to still radiate up from below, much like cooking on a stovetop.
Q: How do I know when to turn the foods I’m grilling?
Let the food do the talking and it will tell you when it’s ready to turn. If you started with clean, well-oiled grates that are nicely preheated before placing the food onto them, the food should easily release from the grates once the grill marks are made. If the food sticks, this is a sign it’s not quite ready to be turned. Leave it on the grill for another couple of minutes before attempting to turn the food again.
Q: How can I get a good grill-mark pattern seared onto my steaks?
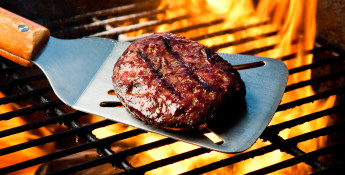
For classic crosshatch grill marks, place the steak onto well-prepared, very hot grates at a 45-degree angle to the grill grates. Resist the urge to “play” with the steak at this point--leave it be so the grill marks can sear in. Once the desired grill marks appear, give the steak just a quarter turn and sear once more until the second set of grill marks appear. This technique will give your steak a great set of classic crosshatch grill marks - the signature of a great grill master.
Q: What are the essential grilling tools I will need?
We all need a good grilling tool kit for the season. This should include the following: long-handled tongs, heavy-duty aluminum foil, an instant-read thermometer with an easy-to-read temperature face, a timer, heavy-duty hot pad mitts, metal skewers for kabobs, basting brushes and a grill basket.
I also always keep a couple of grilling-designated heavy-duty rimmed baking sheets in my kit, too — one for raw foods and the second for cooked foods. (Don’t forget about the supplies mentioned earlier in this article, which would include a long-handled grill brush, chimney starter for charcoal grills, and a long stick lighter for igniting.)

