By Chef Alli on October 1, 2021
Your Guide to Winter Squash
How to choose and cook acorn, butternut and spaghetti squash
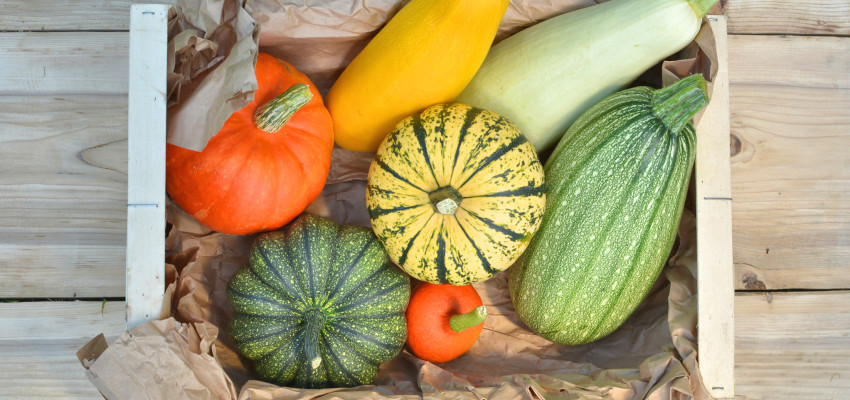
I love cooking with winter squash because their flavors are delicious and they're full of great things like vitamins A and C and fiber. This guide will help you pick just the right one and provides you some of my favorite tips for cooking acorn, butternut and spaghetti squash.
Choosing winter squash
Any winter squash you choose should be heavy for its size and firm to the touch with no soft spots. The skin should be hard and without blemishes, having a rather dull exterior. If you can easily press your fingernail into the skin, the winter squash has not ripened enough. If you have to work at piercing the skin, the squash is fully mature and ready. (This is just the opposite of ripened and ready summer squash!)
When hard winter squash is too ripened, both the skin and the flesh will develop dark spots and mold will sometimes appear as a black or green growth within the exterior; avoid these squash entirely.
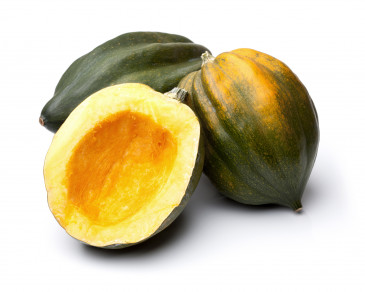
Acorn Squash
This winter squash is shaped exactly as it is named. Smaller in size and with a smooth, dark green skin, acorn squash also sport yellow or orange splotches. The flesh has a very mild and slightly sweet flavor.
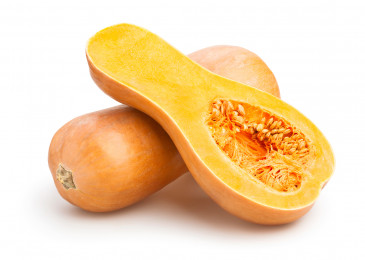
Butternut Squash
A long and slender squash with a bulb-shaped bottom, butternut squash is tan in color with very smooth skin. Butternut flesh is light orange in color with a bit of a nutty flavor.
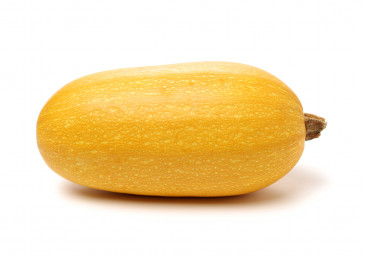
Spaghetti Squash
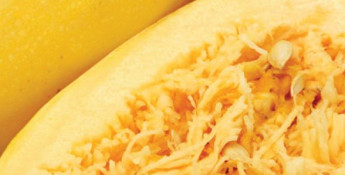
Look for the large, oblong squash that’s pale yellow in color. Popular with low-carb diners, the cooked, mild flesh of this winter squash can be scraped with a fork into long strands of “pasta.. Spaghetti squash is very mild and a tad bit sweet in flavor.
Storing winter squash
Since winter squash have hard skins, they can easily be stored for up to six months after being harvested. Store winter squash in a cool, dry place (ideally 55-60 degrees F.), that is well ventilated; place winter squash on a rack or shelf, but not on the floor.
Don’t store near apples, pears or other ripening fruit since they release ethylene gas which can shorten the storage life of winter squash.
Slicing and cutting winter squash
If your recipe directs you to slice a hard winter squash, or cut one in half, know ahead of time that this task can be very difficult and one of the best ways to get cut or injured in the kitchen.
To make the winter squash much easier to handle for cutting, the best option is to par-cook the squash first.
To do this, pierce the skin of the squash all over using a fork or the tip of a sharp paring knife to allow steam to escape. Place the whole squash into the microwave, cooking at 100 percent power for five minutes. Using hot pads, remove the squash from the microwave, placing it onto a cooling rack.
Once the squash has cooled enough to handle, you can now easily peel and slice it or cut it in half.
Microwaving winter squash
Acorn and butternut squash
Using a fork or the tip of a sharp paring knife, pierce the skin of the squash all over to allow any steam to escape.
Place the pierced squash into the microwave on a large plate or paper towel; microwave for five minutes on full power. Using hot pads, remove the squash to a cutting board. When the squash has cooled enough to handle, slice it in half (lengthwise for the butternut squash), scooping out the seeds within.
Next, arrange the squash halves, cut sidedown, into a greased, shallowand microwaveable casserole dish; microwave on full power for 6-8 minutes or until very fork tender. Let stand at least five minutes before scooping the cooked flesh from the skin. **Please Note: Some people cook their acorn or butternut squash whole, but I have better luck cooking them in the microwave cut in half as directed above. However, I do cook spaghetti squash whole, as directed below.
Spaghetti Squash
Pierce the exterior of the spaghetti squash all over with a fork or the tip of a sharp paring knife.
Place the squash into the microwave on a large plate or paper towel. Microwave on full power for 18-25 minutes, until very fork tender, turning the squash over half way through the cooking time.
Let the squash stand for 10 minutes before cutting in half to remove the seeds; use a fork to scrape up the long strands of flesh, working in batches, transferring the “noodles” to a bowl.
Stovetop cooking for acorn and butternut squash
Pierce the skin of the winter squash all over using a fork or the tip of a small paring knife to allow steam to escape.
Place the whole squash into the microwave, cooking at 100 percent power for just five minutes. Using hot pads, remove the squash from the microwave, placing it onto a cooling rack.
Once the squash has cooled enough to handle, peel the squash then cut it in half; scrape out the seeds, then cut each half into 1-inch cubes. The squash will not be fully cooked at this point and that’s what you want.
To cook the par-cooked squash cubes in a saucepan, cover with lightly salted water, bringing to a gentle boil for 10-15 minutes or just until fork tender.
To steam, place a steamer basket into ½-inch of boiling water in a saucepan; add the par-cooked squash cubes. Cover the saucepan and steam the squash (the water should be at a simmer beneath the steamer basket) 7-10 minutes or until very fork-tender.
**Please note: Spaghetti squash is best cooked whole (or cut in half), but not cut into cubes like acorn or butternut squash.
Baking and roasting winter squash
To bake your winter squash, pierce the skin of the squash all over using a fork or the tip of a small paring knife to allow steam to escape.
Place the whole squash into the microwave, cooking at 100 percent power for five minutes. Using hot pads, remove the squash from the microwave, placing it onto a cooling rack.
Once the squash has cooled enough to handle, cut the squash in half; use a spoon to remove any seeds.
Add ¼-inch of water to a rimmed baking sheet or large casserole dish; add the squash halves, cut-sideup; season to taste with salt and pepper. Bake, uncovered, at 350 degrees F. for 45-60 minutes or until the squash halves are very fork tender, depending on the size of the squash. Cool until squash can be handled, then remove the skin and proceed with your recipe.
If you’d like to roast your squash, instead of adding water to a rimmed baking sheet, generously drizzle a rimmed baking sheet with olive oil; add the par-cooked squash halves, placing them cut-side down on to the baking sheet.
Roast, uncovered, at 400 degrees F. for 45-60 minutes or until fork-tender, depending on the size of the squash.
Pureeing cooked winter squash
To puree cooked winter squash, place a few sections of the cooked and peeled squash into the bowl of a food processor. Pulse the food processor to process the squash, occasionally repositioning the squash in the bowl. Puree the squash until it reaches a smooth consistency, working in batches as needed. If the pureed flesh seems too thick, add a bit of warm chicken broth, water or orange juice as you pulse the squash. Season to taste with salt and pepper.
If you don’t have a food processor, you can use an immersion blender to puree the cooked squash. Next best thing? A good ol’ potato masher.

