By Chef Alli on April 1, 2016
Spring cleaning your kitchen?
Use these organization tips from Chef Alli
Last summer I spent a considerable amount of time re-organizing my kitchen. I'm going to save you some time and frustration and share some organization tips and tricks I learned. They include:
- Use that wasted vertical space like the inside of cabinet doors, the side of your fridge and under your cupboards
- Put your kitchen tools where you can see them when you work (In my world, if I can't see them, they simply aren't going to be used. That's just how it is!)
- Incorporate clear storage jars and containers
- Add baskets for shelf and freezer storage
At first, I wasn't too excited about this endeavor, but once I got rolling, it became a fun challenge. I began by spending a significant amount of time on Pinterest and other websites looking for ideas that would help make my kitchen more functional. Little by little, certain areas of my kitchen got a good work over and I'm pretty darn pleased at how everything turned out.
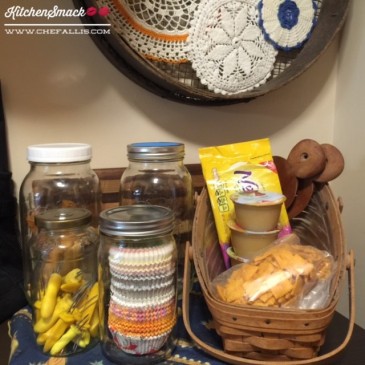
I love storing small items in clear glass containers so I can easily see them, yet they are contained. Here I've place corn cob holders, muffin/cupcake liners and dog treats into jars on top of some shelving in my pantry. (FYI - the Mason jar with the blue lid is actually a sprout jar and the blue part is a screen that allows you to rinse and drain the sprouts each day.) I like that this area is functional, yet a little bit pretty due to the doilies I starched and attached to the potato shaker on the wall. The basket holds snacks that can be grabbed on our way out the door.
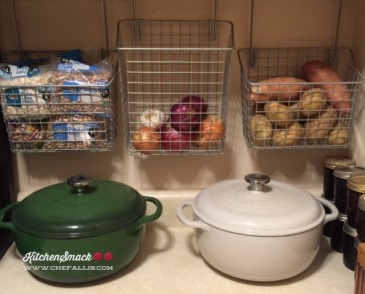 Here, I had my Hubbins, BDP, add some wire baskets to the back wall of my pantry so I could store potatoes, onions and garlic. The wire baskets allow for good ventilation and this helps extend shelf life. I cook a lot of dry beans in my pressure cooker, so a wire basket in the pantry works well.
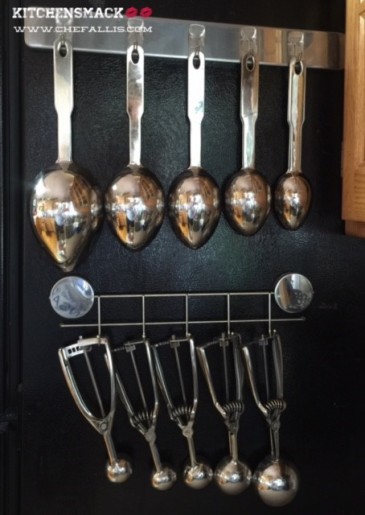 This is a good example of how I used more of the vertical space in my kitchen. I purchased a magnetic knife bar, added some adhesive hooks and hung up my measuring spoons, freeing up tons of drawer space! Once I saw how much I enjoyed having my measuring spoons within easy reach, I added a second magnetic bar for hanging my scoops. They get used a whole lot more now.
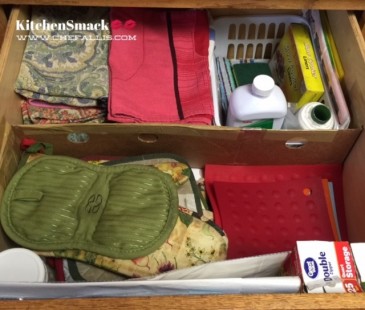
Sometimes a giant drawer can become a giant jumble! I took a piece of cardboard and made a divider by placing it at the halfway point in this drawer. This divider helps hold my dish towels towards the back in two neat stacks and my hot pads in the front. I added a rear corner basket to keep my sponges, scrubbers and miscellenous items together so they can't wiggle themselves all over the bottom of the drawer.
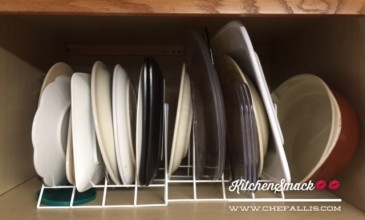
Adding a storage rack like this one to the cupboard above my double oven keeps platters and serving trays upright for easy access. And, I can see what I have much more readily than when they are piled in stacks on a cupboard shelf. (And it NEVER fails that you always need the platter on the very bottom of the stack.....)
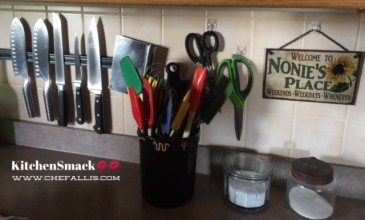 A good friend gave me this magnetic bar for my cutlery. Once it was up, I decided I could add a couple hooks for my cutting shears to keep them in the same general vicinity. And, to free up even more drawer space, I added a couple of utensil jars. One holds all my silicone and the other holds metal utensils.
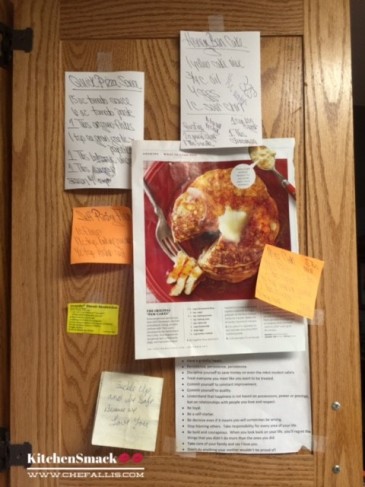
This is the inside of one of my cupboard doors. I learned this little trick from my Mamma! Here is where I keep certain recipes that I'm ALWAYS using, plus love notes from the Hubbins... all within easy access when I need them FAST. This is also a good place to keep some of your favorite pictures and prayers for when you need a lift.
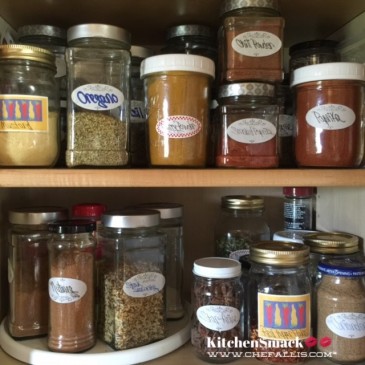
I never throw away a nice glass jar! Since I purchase all my spices in bulk (so much cheaper and fresher this way) I like to store them in clear jars with a nice, easy-to-read label. Here's how to remove a label from nearly any jar: Place the jar (no lid) into a cold oven and set the timer for 10 minutes, then begin preheating the oven to 350 degrees F. When the timer goes off, pull the jar out of the oven with a hotpad. Using your fingernail, grab the corner edge of the label and gently lift it up, slowly peeling the label right off. Some jars will surrender their label easier than others, and I've had great luck using this little process. If there's any sticky stuff remaining from the label adhesive, use a bit of oil to rub it off, then wash the jar in hot, soapy water. This technique works great for removing wine and bourbon bottle labels, as well.
I hope these ideas help inspire you to find ways that your kitchen and/or pantry can become more efficient and organized. When you know where your tools and favorite ingredients are located and have easy access to them, I think you'll find yourself happily using them more often.
A happy kitchen is an organized kitchen, right?

