By Ariean Krieger on April 19, 2016
Barn Quilt DIY
Make a barn quilt using these simple instructions

Hi friends! It's Ariean from OneKriegerChick here to show you how to make a really fun accessory for your barn--a barn quilt!

I love driving through the country and looking at the old farmhouses and barns. Over the past few years, I've noticed more and more quilt blocks hanging on both old and new barns. Just like the barns themselves, the quilt blocks tell their own stories. Some may be an original design, but more often they are based off of a vintage pattern. Today, I'll show you how you can create your own quilt block...it's easier than it looks! First, start by coming up with a design. You can design your own, use a favorite quilt as inspiration, or search online for a pattern you like. I chose this particular design because it is not too complicated. It is all based on a four-block grid for a 4 x 4 sheet of wood.

After sketching out the basic pattern, I filled in the details with a color key. This design is called "Electric Fan" dating from the 1920s and is based off an earlier pinwheel pattern. It only uses three colors, which makes it a really easy block to start with.

This quilt block is going to be a gift for my Mother-in-Law for Mother's Day (Shhh! It's a secret!), so I wanted it to incorporate her favorite color (navy) and still coordinate with her barn. I purchased a 4 ft. sheet of marine grade plywood from the lumber yard. It comes in 8 ft. sheets, so I had them cut it in half for me. I'll be painting another quilt block on the other sheet. Marine grade wood is quite a bit more expensive, but will hopefully last longer in the elements. A less expensive plywood would work too.

Paint a base coat using exterior paint. I used a white in a satin finish.

After the paint dries, use a 4 ft. level to mark out the pattern with a pencil. If you don't have a 4 ft. level, just use a straight edge that lays flat.

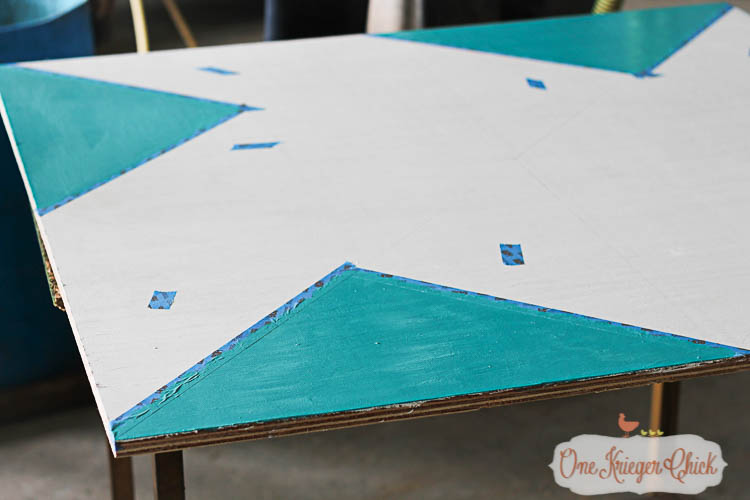
See those little pieces of tape? Those triangles will remain white and this is my way of not accidentally painting them. Use painters tape off the outside edge of each of the triangles that will be painted teal.

Paint each of the teal triangles. This may take multiple coats of paint to achieve the color you like. I just used acrylic craft paint. You could also choose to use exterior paint tinted in the colors of your choice.

Once the teal paint has dried, remove the tape.

Repeat the same process for the navy triangles.

I must have gotten a little excited about my painting because I completely forgot to take pictures of the navy triangles during the painting process. Oops! Here's what they look like once the tape was removed...

To finish the edge, we added a frame using stained 1 x 2 boards. Once the entire piece was finished, I applied a few light coats of water seal protectant to help protect it from fading and chipping over years to come.

I love how it turned out. Cross my fingers my mother-in-law does too.

You might also enjoy


Ariean Krieger
Ariean is a former high school teacher turned stay at home Momma of three little boys. She enjoys finding good junk and transforming it into unique home decor...a cup of coffee and a great book...cooking and crafting with her boys and connecting with YOU! Ariean and her crazy crew live in the country outside of... Read more
